In the world of nail art, trends come and go, but some styles stand the test of time. Ombre tip nails, with their mesmerizing gradient effect, have become a timeless and popular choice for those seeking chic and sophisticated nail designs. The art of mastering the ombre tip requires creativity, precision, and a touch of finesse. In this extensive blog, we will explore the techniques, tips, and inspiration behind creating stunning ombre tip nails.
Understanding Ombre Tip Nails:
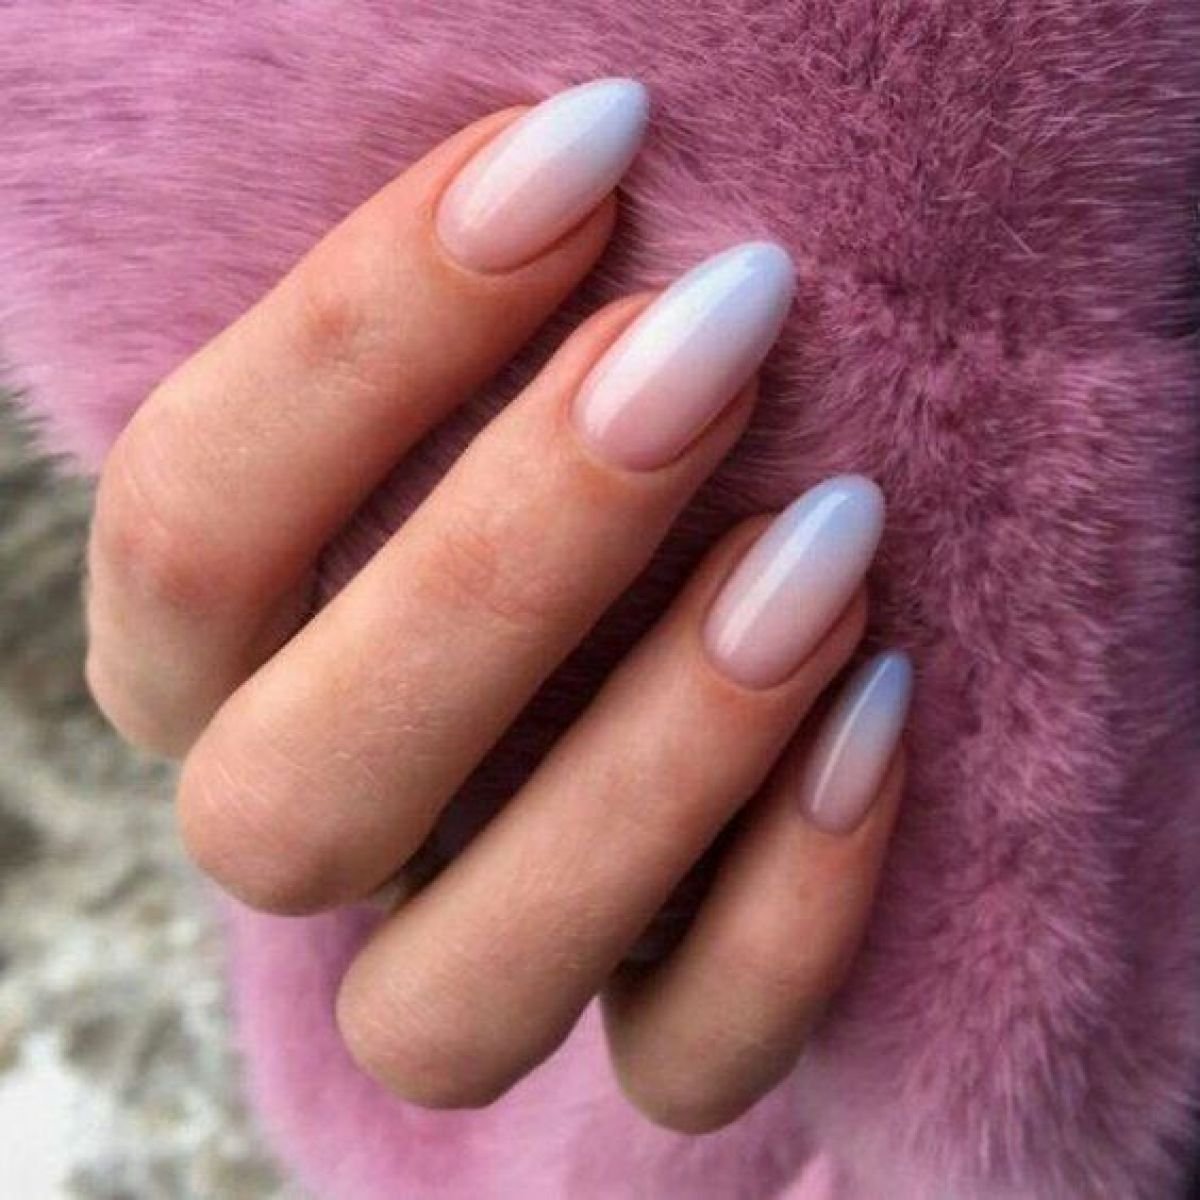
Ombre tip nails involve blending two or more colors seamlessly, creating a gradient effect that transitions from one shade to another. This technique can be applied to various nail shapes and lengths, making it a versatile and eye-catching option for nail enthusiasts. Whether you prefer a subtle transition or bold, contrasting colors, ombre tip nails offer endless possibilities for expressing your style.
Materials Needed:
- Base Coat:
- Ensure a smooth and even base by applying a high-quality base coat. This not only protects your natural nails but also provides a solid foundation for the ombre effect.
- Nail Polish Colors:
- Choose two or more nail polish colors that complement each other and create a harmonious gradient. The color combination is key to achieving a visually stunning ombre effect.
- Makeup Sponge:
- A makeup sponge is a crucial tool for creating the gradient effect. Its porous texture allows for smooth color blending.
- Top Coat:
- Seal and protect your ombre masterpiece with a durable top coat. This not only enhances the shine but also ensures longevity.
Step-by-Step Guide to Achieving Ombre Tip Nails:
- Prepare Your Nails:
- Start by shaping and buffing your nails to your desired length and shape. Push back the cuticles for a clean canvas.
- Apply Base Coat:
- Evenly apply a layer of base coat to all your nails. This helps in preventing staining and promotes a smoother application of the ombre colors.
- Choose Your Colors:
- Select the nail polish colors you want to use for the ombre effect. Consider the color wheel for harmonious combinations or experiment with contrasting shades for a bold look.
- Paint the Base Color:
- Apply the lighter color as the base coat on all your nails. Allow it to dry completely before moving on to the next step.
- Prep the Sponge:
- Dab each chosen ombre color onto the makeup sponge, ensuring they slightly overlap to facilitate blending.
- Sponge Application:
- Gently press the sponge onto the tips of your nails, creating a gradient effect. You may need to repeat this step for a more intense color payoff.
- Blend and Repeat:
- Use a gentle dabbing and rolling motion to blend the colors seamlessly. Repeat this process until you achieve the desired ombre effect.
- Clean Up Edges:
- Clean up any excess polish around your nails using a small brush or a cotton swab dipped in nail polish remover.
- Apply Top Coat:
- Once the ombre effect is dry, apply a generous layer of top coat to seal the colors and add a glossy finish.
Ombre Tip Nail Design Inspirations:
- Classic Nude Ombre:
- A subtle transition from nude to blush creates an elegant and timeless look suitable for any occasion.
- Vibrant Sunset Hues:
- Experiment with bold sunset colors like oranges, pinks, and purples for a striking and energetic ombre design.
- Mermaid-Inspired Blues and Greens:
- Dive into a mesmerizing underwater world by blending oceanic hues like blues and greens for a captivating mermaid-inspired ombre.
- Glamorous Gold and Black:
- Elevate your ombre game with a touch of glamour by combining gold with a deep black for a luxurious and edgy look.
Ela Nail Spa: Elevating Ombre Tip Nails to Artistry:
For those seeking professional expertise in ombre tip nails, Ela Nail Spa stands out as a haven for nail enthusiasts. Known for their commitment to craftsmanship and innovation, Ela Nail Spa offers a range of services that transcend conventional nail art.
Ela Nail Spa in Balewadi, Pune, stands out as a premier destination for nail art enthusiasts seeking expert craftsmanship and a personalized touch. Here’s why Ela Nail Spa is the ideal choice for mastering the art of ombre tip nails:
- Skilled Nail Technicians:
- The spa boasts a team of skilled nail technicians who are well-versed in the latest nail art techniques, ensuring a flawless ombre tip design.
- Quality Products:
- Ela Nail Spa uses high-quality nail polish and products, ensuring vibrant colors, long-lasting results, and a professional finish.
- Customized Nail Art:
- The spa offers a personalized approach, allowing clients to choose their preferred color combinations and style variations for unique and customized ombre tip nails.
- Hygienic and Relaxing Environment:
- Ela Nail Spa prioritizes hygiene and provides a serene and relaxing environment, offering a perfect setting to pamper yourself while getting stunning ombre tip nails.
Summary:
Ombre tip nails represent an artful and timeless expression of personal style in the world of nail design. Mastering the gradient effect requires a combination of technique, creativity, and the right materials. Whether you’re experimenting at home or seeking the expertise of professionals, ombre tip nails offer a versatile and captivating canvas for expressing your individuality. Elevate your nail game with the mesmerizing allure of ombre tips, and let your fingertips become a work of art.