Nail art is a fun and creative way to express your personal style, and with the right tools and techniques, you can achieve salon-worthy results right at home. Whether you’re prepping for a special occasion or just want to give your everyday look a bit of flair, DIY nail art is an accessible and enjoyable craft. In this step-by-step guide, we’ll explore how you can create beautiful nail designs at home, and we’ll also highlight the fantastic services offered by Ela Nail Spa in Balewadi, Pune, for when you’re looking to elevate your nail game to the next level.
Introduction to DIY Nail Art
DIY nail art can be as simple or as intricate as you want it to be. With a little practice, you can master various techniques, from basic designs to more elaborate patterns. Not only does it allow you to experiment with different styles and colors, but it also saves you time and money compared to frequent salon visits. If you’re new to nail art, start with some basic designs and gradually move on to more complex techniques.
Step 1: Gather Your Tools and Supplies
Before you dive into your nail art adventure, it’s essential to have the right tools and supplies. Here’s a basic list of what you’ll need:
- Nail Polish: Base coat, top coat, and a selection of colors.
- Nail Art Tools: Brushes, dotting tools, striping tape, and nail art pens.
- Additional Supplies: Nail file, cuticle pusher, nail clippers, and a small brush for cleaning up mistakes.
- Optional: Nail decals, glitter, and stamping plates.
For the best results, ensure that you use high-quality nail products. If you prefer a more professional touch, Ela Nail Spa in Balewadi, Pune, offers a range of services like Gel Polish, Ombre Tip, 3D Art Tip, and more to help you achieve stunning nail art.
Step 2: Prepare Your Nails
Proper nail preparation is crucial for a flawless manicure. Here’s how to get your nails ready:
- Remove Old Polish: Use a nail polish remover to clean off any previous nail polish. Make sure your nails are clean and free of any residue.
- Shape Your Nails: File your nails to your desired shape. Whether you prefer square, oval, or almond-shaped nails, a consistent shape provides a neat look.
- Push Back Cuticles: Gently push back your cuticles using a cuticle pusher. Take care to avoid harming the skin surrounding your nails.
- Buff Your Nails: Lightly buff the surface of your nails to remove any ridges and create a smooth base for polish.
- Clean Your Nails: Wash your hands to remove any dust or debris from filing and buffing.
Step 3: Apply Base Coat
A base coat is essential for a long-lasting manicure. It safeguards your nails from discoloration and improves the adherence of the polish. Apply a thin layer of base coat to each nail and let it dry completely before moving on to the next step.
Step 4: Create Your Design
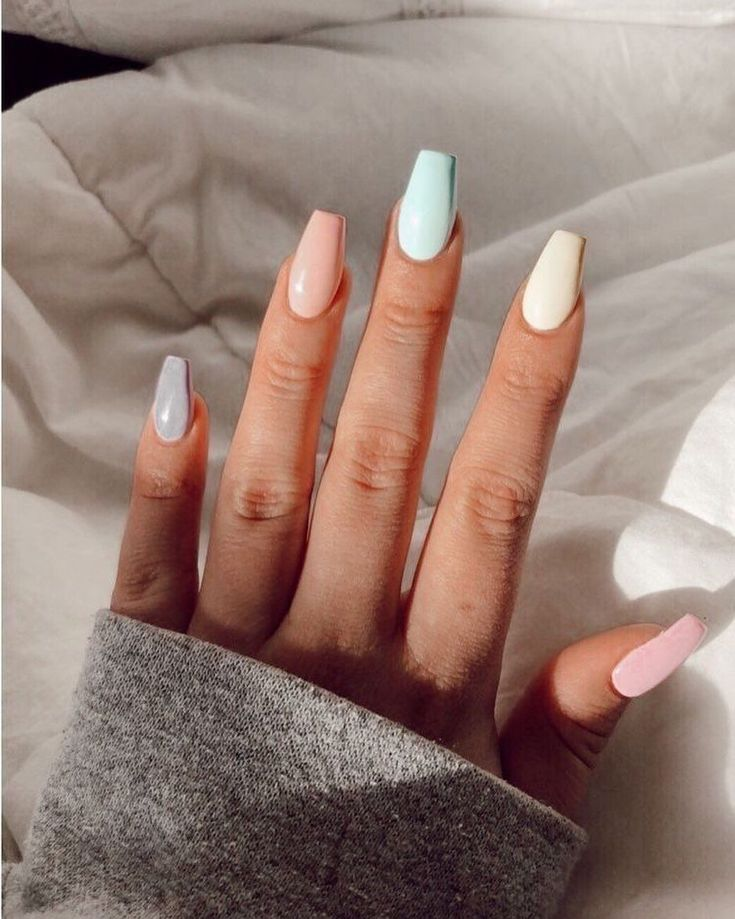
Here’s where the fun begins! Choose your nail art design based on your mood and occasion. Consider these proven strategies as effective options:
- French Tip Nails: A classic design featuring a natural nail color with white tips. You can use striping tape to create clean lines and a steady hand for precision.
- Ombre Tip: Gradually blend two or more colors from the base to the tip of the nail for a gradient effect. Sponge application can help achieve a seamless blend.
- Marble Nail Art: Create a marble effect by swirling different nail polish colors on a piece of plastic wrap and then transferring it onto your nails.
- Glitter French Tip: Add a touch of sparkle to the classic French manicure with glitter polish. Apply a layer of glitter over the tips for a glamorous look.
- 3D Art Tip: Use nail art pens or gels to create three-dimensional designs like flowers or bows. This technique adds texture and dimension to your nails.
- Cat Eye Nails: Achieve a mesmerizing cat-eye effect using magnetic polish. The magnetic particles in the polish move when a magnet is held over the wet polish.
- Chrome Tip: Apply a chrome powder to achieve a high-shine, mirror-like finish on your nails.
Step 5: Apply Top Coat
Once your design is complete and dry, apply a top coat to seal in your artwork. This helps protect your design from chipping and gives your nails a glossy finish. Be sure to apply the top coat evenly and cover the edges of your nails for the best results.
Step 6: Clean Up
After your top coat has dried, clean up any mistakes or excess polish around your nails. Use a small brush dipped in nail polish remover to carefully remove any smudges or stray polish.
Step 7: Maintain Your Nails
To keep your DIY manicure looking fresh, follow these maintenance tips:
- Avoid Water: Try to avoid prolonged exposure to water as it can cause your polish to chip.
- Moisturize Your Cuticles: Apply cuticle oil regularly to keep your cuticles healthy and your nails looking neat.
- Touch Up as Needed: If you notice any chips or wear, touch up your polish or redo your design as needed.
Summary
While DIY nail art is a fantastic way to express your creativity and save money, sometimes you need a professional touch. Ela Nail Spa in Balewadi, Pune, offers a wide range of services for those looking to elevate their nail game. Their offerings include:
- Gel Polish: Long-lasting and chip-resistant for a sleek look.
- Manicure & Pedicure: Pampering treatments to keep your hands and feet in top shape.
- Nail Extensions: Add length and shape with professional extensions.
- Bridal Packages: Perfect for brides-to-be, including Bridal Nails, Ombre Tip, 3D Art Tip, and more.
- Exclusive Arts: Unique designs such as Sticker Nails, Stone Work Nails, and Glitter French Tip Nails.
- Nail Refills & Removal: Maintain or remove your extensions with expert care.
- Dipping Nails, Marble Nail Art: Explore advanced techniques for stunning results.